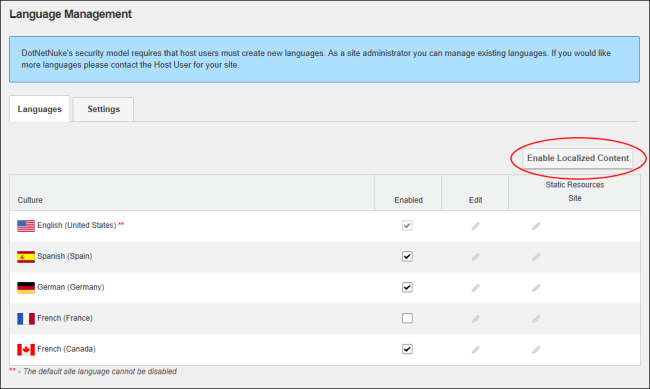
How to create a localized copy of the current site content for each of the enabled languages using the LanguagesMultiple languages (cultures) can be enabled on DNN. This can be enabled for the DNN framework (e.g. the field names on the Edit pages) and for the site content by creating content in each language using content localization. module. This creates a translator role ( titled Translator and then appended with the country code. E.g. Translator (EN-AU) ) for each enabled language. This also enables the Localization tab under PageA page on a DNN site. Settings for all site pages. See "Localization Settings for New Pages" DNN Platform users (including anonymous users) must be granted Edit ModuleDNN uses a modular design system to display content on a page. One or more modules are added to each site page to create and manage the site content. There are many different types of modules, each managing a different type of site content or site administrative tasks. permissions. Evoq Content users (including anonymous users) must be granted Edit Content permissions.
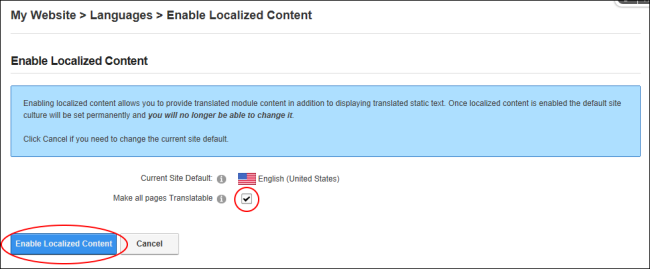
Prerequisite. Localized content must be enabled by a SuperUserThese users have full access to manage the settings and content of all sites with this DNN installation, including the Host site. SuperUser accounts are created using the Host > SuperUser Accounts module.. Localized content cannot be disabled once it has been enabled.
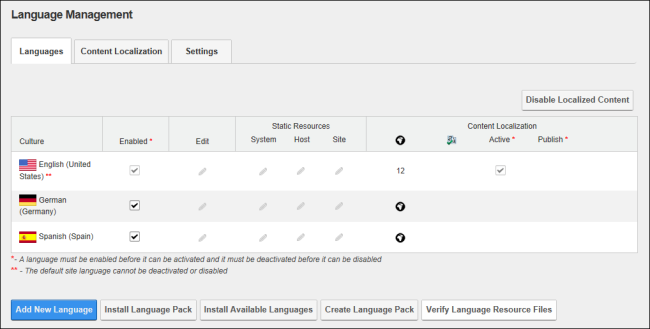
To view the newly created localized copies for this language, click on the country flag for this language (typically located in the top right corner of the site above the menu). This displays the localized copies of these pages in the menu. Note: PageA page on a DNN site. names are appended with the country code. E.g. For Australia it is (EN-AU). Modify these names by editing the PageA page on a DNN site. Name. See "Setting Page Details"

A translator role named Translator (en-AU) is now displayed in the Security RolesRoles control which users can view and manage site pages and content. Roles can be created using the Admin > Security Roles page or by creating Social Groups. module for each language that is enabled. Before translation can begin, the users who are the translators for each language should be added to the newly created translator roles. See "Adding a User to a Role"
Tip: Assign additional roles and users as translators for a language. See "Setting Translator Roles"
Next Step: The site is now ready for translation. See "Translating a Page" or See "Translating a Module".